A basketful of solutions

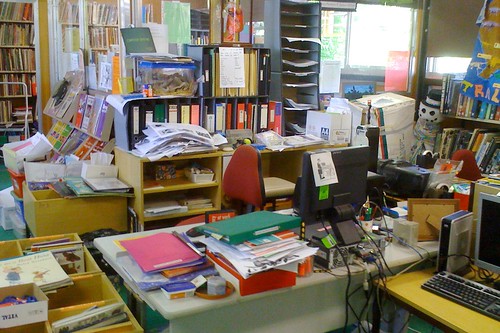
In the madness that is Term Four stocktake, I had several brainwaves and lucky coincidences that enabled me to complete several new shoestring elements to my school library makeover.

Those tiny books that some young borrowers covet like long-lost treasures! They slip inside other books, fall under shelving, cause whole rows of neatly shelved books to go wonky. How to store them efficiently?

In one of my previous schools, we had a spinner rack that accommodated all small junior fiction books. I hated that spinner, but those books were always hot picks! At least the spinner made them easy to identify, easier to shelve, and put them all on front-on display, in a place where the students were motivated to go.

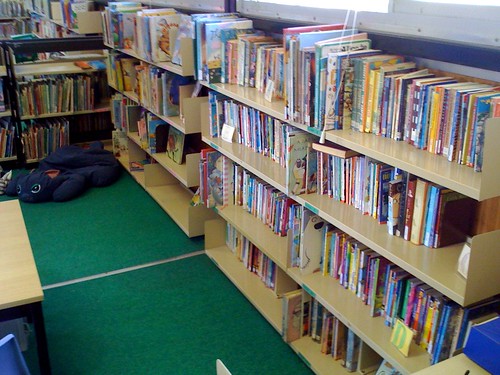
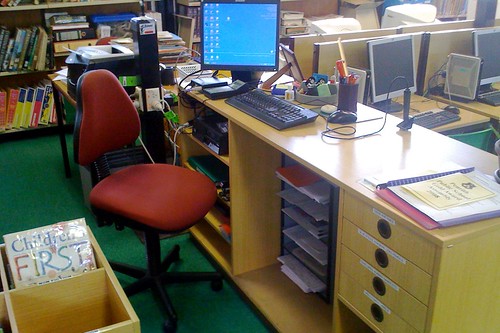
At the course last term, Kevin Hennah challenged us to investigate ways to make more of our library collections face “front cover out”, rather than “spine out”. One day, I was wandering through a local Asian “two dollar” shop and found a vibrant pink plastic set of tiered baskets. At $16, it was certainly more than other items in the store, but the pink was the same colour the previous teacher-librarian had assigned to shelf signage in the “Easy Fiction” section. Now, I’d been contemplating changing “Easy” to “Junior”, although I wasn’t sure how to tell my clerical assistant that we’d eventually be changing a lot of call number stickers, but the students are very familiar with the pink designation for this section.

hot pink basket

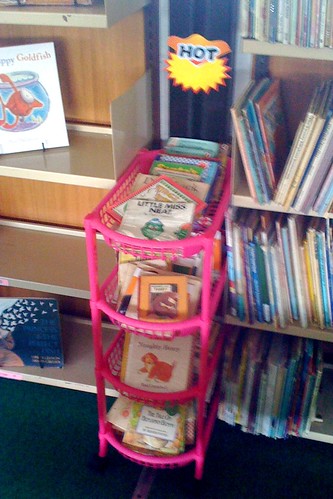
It was a tight fit between two shelving units, but no one’s likely to move the tiers, and what a great way to maximise some dead space, put all the tiny books in one convenient location – front on – and add a splash of day-glo colour!

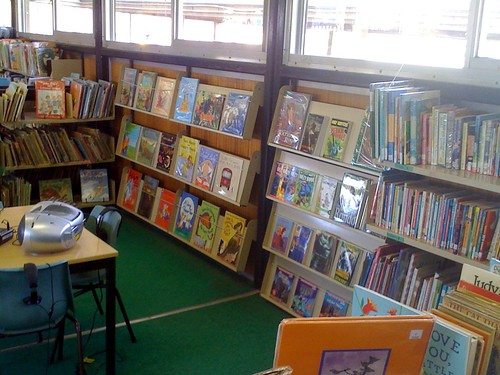
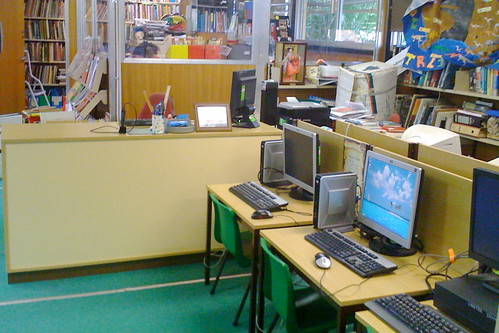
Coincidentally, another colour the shop had in stock was green, the colour of our “Fiction” section. The next day, I raced back to get the last green set left in stock:

hot green basket

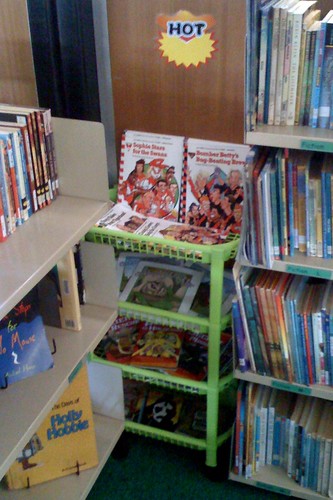
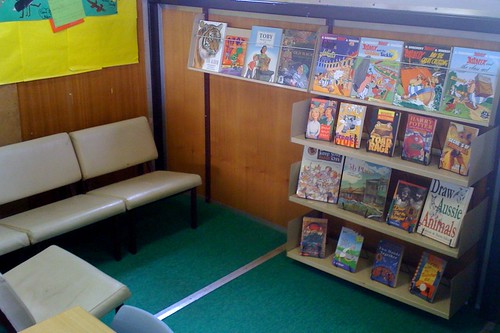
This time, the shelving units I’d planned to wedge the baskets between were too close together and unable to me moved apart. So, I dragged a different set out from a wall, wedged the backets beside it, and slide the shelves snugly against the baskets. Charged with success, I went back for an orange set to put in the “Non Fiction” section:

reno dragon and hot orange basket

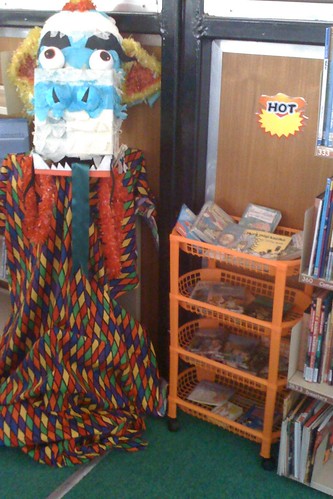
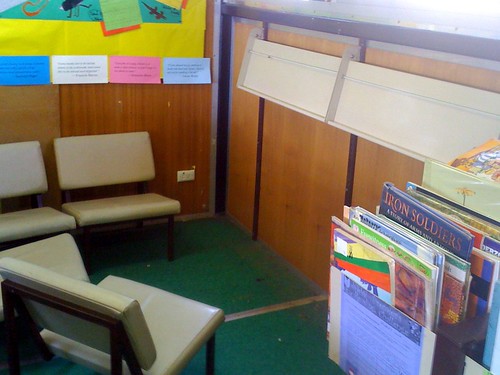
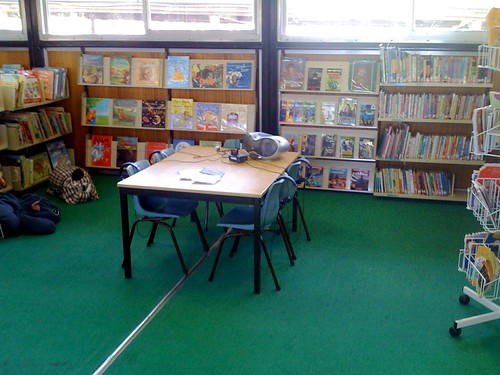
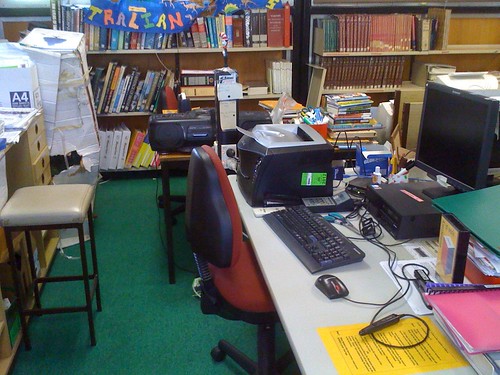
To the left is a papier-mache Chinese dragon from my classroom teacher days, and he’s become a bit of a mascot in the library in recent years. Kevin Henneah would probably say that his time as come; I had to bring him down from his usual high corner, to make room for the wall-preparation renovations anticipating the arrival of our new interactive whiteboard (IWB). We had a stack of unused shelving packed tightly against a wall and, until the dragon gets a better location, he seems quite at home next to the baskets of small books of myths and legends in “Non Fiction”.

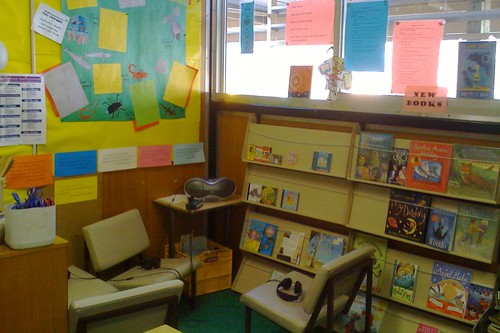
Finally, note the “Hot” signs above each basket, which came from a different Asian “two dollar” shop, this time in the Sydney CBD. The packet of ten cardboard showcards was just $4. Also available was a set with “It’s New!” Thanks Hot Dollar – both of your stores! My shoestring is stretched but still intact!

The crest of the wave?

gold adhesive letters

This $2.00 packet of metallic gold, adhesive letters (from a $2 shop, of course) provided inspiration for the past weekend’s project. I had decided that a version of our school badge – perhaps in three dimensions and in colours of white and burgundy ? – might be the most suitable design piece for the large blank, burgundy space above the windows of the library office, and a counter balance for the big “READ” sign in the far corner. When I saw these letters, I realised that “P E N R I T H” would actually be perfect scale to the photocopy of the school badge I’d enlarged to A3 earlier in the day.

Crest creation

On Saturday morning, I noticed that I’d left my A3 pattern at work/school, so out came the trusty ruler and pencil and I enlarged the small photocopy I did have.

I still had a spare Officeworks‘ plastic and cork “bulletin bar” (at $1.99), so I painted this burgundy and incorporated the shape so it would support the two main sections of shield and scroll, and might even give the illusion of a three-dimensional shaft section of the rocket which blasts off from our school badge (originally designed in the late 60s inspired by the 1969 NASA moon landing, I understand). The first version of the badge was in yellow and brown, the old school uniform colours, but it’s been red, white and blue for many years now, and simply black and white on letterheads, etc. I wasn’t changing the school colours here, but a rendition of the b/w badge using white and burgundy as the contrasting colours.

From Eckersley’s art supply store, I bought an A2 sheet of layered 5mm foamboard (@ $4.95), but I still have a lot, equivalent to A3 size, left over. These foamboards are more sturdy and resilient than cardboard, and come in numerous colours. I found a distinctively off-white variety, and a pure white one. Since the white lettering I’d been painting these past few weeks is lacquered, and isn’t really a stark white, the off-white foamboard seemed the best choice.

Crest

A Stanley knife was used to cut out the shapes I needed. The rocket became a cut-out hole, while the scroll had extra shapes to bring some parts into the foreground. The letters, plus two spare magnetic letters (ie. in the same font as the URL signage), were painted burgundy, lacquered with matt varnish, and glued into place. The school motto is a print-out from the computer. Essentially, the finished design is in four layers, and should cast some interesting little shadows.

My main concern was that it had to look classy, but it also had to be cheaper than a commissioned styrofoam sign from a professional signwriter.

Above window reno

This morning, I used nails to secure the three plastic strips to the wall. In case we ever get a new library built one day, I’m planning to take all my handiwork with me! Because the library’s closed for stocktake this week, there has been very few visitors and I’m anxious to show off my latest handiwork.

Desk end of library - final

The grey, soft-covered piping that emerges from the air-conditioner and connects to conduit is still giving me grief. I’m not game to paint it, in case the plastic-like material repels the paint. Maybe I’ll try wrapping it in burgundy ribbon? Happily, the ugly grey conduit disappears against the wall when covered in the burgundy paint.

The more we do to improve the look of this end of the school library, the more we reveal of the huge windows… and the mess beyond. My clerical assistant has been extremely busy removing my untidy “piles of stuff” from the tops of each vertical filing cabinet. Thanks Louise!

url above office window

Total cost of this makeover: Add another $8.94 to last week’s $39.96 and you’ll get $48.90. I think. 😉

Reinventing library nooks

For many years, my teacher-librarian predecessor and her clerical staff pondered over a better location for the “New Books” nook in our portable school library, but there really never seemed to be anywhere else that suggested itself. The existing corner is/was close to the main entrance, but too far from the Circulation Desk. It was also quite hidden by a bulky, free-standing, double-sided stand of shelving, currently chock full of Premier’s Reading Challenge (PRC) titles for the Stage 2 and Stage 3 students.

There was one viable alternative location, perhaps: outside the office (and Teacher Reference), but the adjacent exit door is one rarely used by students, and the sloping display shelves outside that room seemed more suited to showcasing new Teacher Reference resources.

The most frustrating thing with the old “New Books” section, at least as it occurred to me over the past two years, has been that the Early Stage 1 and Stage 1 students rarely ventured into “New Books” territory, despite many of these new books being gorgeous, new picture books, displayed cover out, and obviously aimed at their reading levels. Too often, newly acquired and processed titles in “New Books” have remainedin pristine condition weeks, sometimes months, after our volunteer covering parent placed them there, because they weren’t being touched! I’m sure there’s nothing worse than dusting “New Books” additions! Ideally, these beautiful, inviting books should have been leaping off the shelves, being wanded at the Circulation Desk, and into students’ library borrowing bags to leave room for the next batch of new books.

THE CORNER NOOK

PRC, audio and new books nook
Before: The crowded old nook, trying (and failing) to focus on the PRC books, AND new books AND a listening post area, all at the same time. Icky clutter – and an OH&S trip hazard to boot! All paper signs on the window were removed on Day 1 of my renovations, of course.

PRC nook underway
Underway: The PRC nook awaits the arrival of a couch, some PRC books to go on display, and some new signage, of course. The coloured papers at left belong to a class Book Week display, plus a few library-themed famous quotations. Earmarked for removal/rethink.

Nook ready
Continuing: Shelves and display of books in place.

A few months ago, in a somewhat desperate attempt to bring a little more drawing power to the “New Books” corner, I introduced the listening post set, which was obtained free via bonus coupons from Scholastic Book Clubs. Well, it sounded like a wonderful idea! Moving some of the new titles aside, I showcased some (hardly used) audio books and music, on CD and audiocassette, from Teacher Reference. As there wasn’t really room for more than four bench seats in the nook, I plugged in only four of the eight headphone sets.

While moderately popular, the listening post has caused its own share of niggly problems, mainly concerned with students tripping over the leads (or tangling them all together), as they left the area at the end of lunchtime.

Last Friday afternoon, I had an epiphany! The solution to the display and OH&S concerns! I hope.

I began preparing a new area for “New Books” and the listening post set… between Fiction and Easy Fiction. This new area is equidistant from both main doors, essentially in the centre of the library. (Moving many of the sloping display shelves from the Stage 2 & 3 PRC area also means that there’ll be room left for a small comfy couch and cushions – an attractive retreat for ready PRC books at lunch breaks? I already even have a free couch on standby. It’s been on my front veranda at home since last January, while I pondered if I’d ever locate the exact, best place for it. I’ve even had two cute cushion covers to go on it, waiting in their original packing, since Easter!)

THE OTHER NOOK
Fiction shelving
Before: Easy Fiction blurs into Fiction, distinguished only by tiny, alphabetised, shelf labels in pink or green, plus handmade lettering in little perspex picture frames.

Fiction shelving reno
Underway: The goal was to have some front-facing books separating the two areas! New signage to come!

Spines-out “Easy fiction” was shunted to the left, “Fiction” was shunted to the right, leaving a new, clear space to add some sloping shelves (cannibalised from a free-standing magazine rack that was never used. The regular shelves were then placed on the magazine rack. Now the PRC section can be expanded to fit the space.) There’s certainly lots more “face out” fiction on display now.

Fiction nook
Before: Another angle on the cramped Fiction sections.

New books and audio nook underway
Underway: A similar angle on the revamped Fiction section, now boasting heaps of “New Books” display space. Even the cat and dog library beanbags look happier! New signage to come.

And the answer to the question you’ve perhaps been mulling over?

Total cost of this renovation: Nil. (So far.)

An update to both of these nooks has been posted!

Shoestrings vs pursestrings

At this time of year, most school library budgets have reached rock bottom. But let’s see how much renovating I can do before I submit a proposal for actual funds to keep transforming the library environment.

Last week, on the Monday, I spent a few minutes racing around the library with a digital camera. Although I’d previously been quite happy with our very colourful, but often unruly, library environment, aiming a camera at it, inside and out, really showed up the library’s numerous inadequacies, many of which could no doubt be rectified quite quickly. My “Spidey senses” sharpened due to a recent professional development day focusing on improving design and functionality in the library, I was eager to get started.

Using the principles of Kevin Hennah‘s “Transforming Your Library on a Shoestring Budget” presentation of two weeks ago, my clerical assistant, Louise, and I spent part of last Tuesday removing every random piece of dusty, homemade, laminated and unlaminated signage, plus many deteriorating old commercial examples, from the walls and windows.

One day, one of us will have to take to all the stale tape and Blu-Tack marks that remain. Hopefully. But it’s already a huge improvement!

Total cost of that renovation: Nil.
circulation
Before: The circulation desk – and a mess of exposed paper and wires.

circulation reno
After: The new “old” circulation desk – a work in progress.

Today (oops, yesterday already!), my clerical assistant was back and, together with a parent helper, we pulled out an existing, old, wood-veneered, circulation desk – from its previous position along a partition wall (with its ugly open shelves on public display, badly overloaded with paper and junk – stuff which no library patron ever needs to see). We turned the unit around 180 degrees, to show its plain, clean front, and hid the computer’s hard drive unit under the counter top.

Behind desk - old
Before: The old grey circulation desk – a mess.

Behind desk
After: The new “old” circulation desk – a work in progress.

We then dragged the adjustable, grey, 80s, ergonomic table, which has supported the library’s main OASIS computer for many years, to the other end of our small bank of networked computers. We used that to replace five small, wobbly student desks (of the 70s) that had been added, over recent years, a few at a time, as the library acquired extra network computers from around the school – usually cast-offs after a computer roll-out. At the same time, we removed one non-functional computer from the network.
computers
Before: The bank of computers – note gaping crevice between carrels.

computers reno
After: The relocated ergonomic grey desk, formerly our circulation desk.

Not long after, my next class – of Stage 3 students – came into the library. “Wow!” they exclaimed, admiring our hasty transformation, “More computers!”

Huh?

Well, what do you know? Reducing the spaces between the desks, removing one faulty computer, and switching to one big table instead of five littler ones, made it look like we had more computers, not less! Unfortunately, I only just realised that none of my “Before” photos properly showcase the five old school desks which held up four of our network computers and a printer. You can see one in the foreground of the “Before” shot.

By the way, I’ve since tweaked the new ergonomics somewhat:
Ergonomic reno
Above: Making a table a little more ergonomic. And comfortable.

Total cost of this renovation: Nil.

Please stay tuned! There’s so much more work to be done. You know, this would make a great TV show. We could call it… “Renovation Rescue”. (Nah, I think that’s been taken.)

And thank you again Kevin!

Professional learning with Kevin Hennah

Teacher-librarians and associates in the Penrith, Mount Druitt, Blacktown, Windsor and Parramatta areas attended today’s stimulating conference at the Rooty Hill RSL Club’s function centre. Guest speaker was Kevin Hennah, who presented fascinating sessions on Library Design and Space Management, and Transforming Your Library on a Shoestring Budget.

What was most exciting to me was that Kevin took care to relate the visual improvements to the physical library space to improved outcomes for student learning. He encouraged us to consider how renewed and improved design and furniture layout could increase the appeal of the library’s holdings, and hence borrowering stats can provide measurable proof that the design changes work.

And since a lot of public school libraries are lucky to get he budget they want/need to keep the library running, we were all grateful to the section of Kevin’s presentation dedicated to “Transforming Your Library on a Shoestring Budget”.

I certainly can’t wait to get back into the library on Monday, to start ripping down all those ugly, useless bits of multi-coloured paper that are affixed with sticky tape and Blu-tac to the furniture, walls and windows… (How did Kevin know they were there?)